Adding a sticky top bar in Genesis is a good way to promote anything special whether it is discount or deal. In this short tutorial, I will show you how to add or create sticky top bar in Genesis.
There are few reasons for adding a top bar in your website. Few of them are.
- If you want to advertise any post/page.
- Special discount.
- Important message to the website users.
- Search bar.
- Custom Menu.
- Social Links.
You can put any information in the top bar as you like. Remember you, I will not style it as much because everyone has own needs. So you can use HTML widget of WordPress and then style as per your need. Let’s start.
How To Create Sticky Top Bar in Genesis
This section has many parts like creating widget area, displaying it, adding jQuery, and styling. I will cover each of them in depth. I request you to follow the steps carefully. Let’s start with first part.
Creating a Widget Area
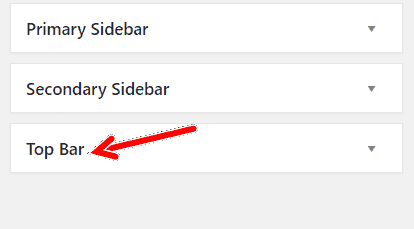
This is the important part of the process. We will add a widget area named as ‘Top Bar’.
Enter the code in the functions.php file but please be careful while editing file. Because if you did a wrong thing, your admin area will show you white screen.
genesis_register_sidebar( array(
'id' => 'top-bar',
'name' => __( 'Top Bar', 'websiteguider' ),
'description' => __( 'This is a widget area that is the top bar', 'websiteguider' ),
) );
If you entered code correctly, you will see a new widget area like this.

Display Widget Area
I want the top bar to be shown on every page like home, posts, pages. So I will add this code to display widget area before header using genesis hook.
Add this code to the functions.php but carefully.
add_action('genesis_before_header', 'create_top_bar_before_header');
function create_top_bar_before_header(){
genesis_widget_area( 'top-bar', array(
'before' => '<div class="top-bar widget-area"><div class="wrap">',
'after' => '</div></div>',
) );
}
Here I am genesis_before_header hook, you can display the widget area anywhere using the hooks.
Adding jQuery
You will have to create a file named as top-bar.js anywhere but lib folder is recommended. So I put the file inside themes lib folder.
Add the following code to the file we just created.
jQuery(document).ready(function($){
$(window).scroll(function(event) {
if($(document).scrollTop()>200){
$('.top-bar').addClass('shrink');
} else {
$('.top-bar').removeClass('shrink');
}
});
});
Now we need to enqueue this script and we have to load it after jQuery. The reason for adding this script is to create sticky top bar in Genesis scrolling and stylish. Add this code to functions.php .
add_action( 'wp_enqueue_scripts', 'load_top_bar' );
function load_top_bar() {
wp_enqueue_script( 'load_top_bar', get_template_directory_uri() . '/lib/top-bar.js', array('jquery') );
}
Styling The Top Bar
The jQuery script we applied earlier adds a class to the widget area. With the help of added class, the top bar becomes sticky. I haven’t added much style to it because as said earlier everyone has own needs. You can style it as per needs.
Add below code to the style.css to make the top bar good looking.
.top-bar {
position: relative;
background: #e83e17;
color: white;
}
.top-bar.shrink {
background-color: white;
-webkit-animation-duration: .5s;
animation-duration: .5s;
-webkit-animation-name: slidedown;
animation-name: slidedown;
-webkit-animation-timing-function: cubic-bezier(.075,.82,.165,1);
animation-timing-function: cubic-bezier(.075,.82,.165,1);
position: fixed;
top: 0;
left: 0;
right: 0;
z-index: 9999;
padding: 0;
box-shadow: 0 2px 6px 0 rgba(0,0,0,.07);
background: #fff;
transition: all .3s cubic-bezier(1, 0.18, 1, 1);
}
.top-bar .wrap {
padding: 14px 0;
font-size: 15px;
}
.top-bar p {
margin: 0;
}
Finally, the output of our work is.

I hope you loved the tutorial, if so please do share and comment.

Leave a Reply