Are you looking for a tutorial on creating a horizontal opt-in form below the header in Genesis?
If yes, you are at right place.
This tutorial will show everything to create the best, modern designed, and a good looking horizontal opt-in form below the header.
Let’s begin.
Creating a Widget Area
The first we do have to do is to create a widget area where we will add the form. You have to open the theme editor and edit functions.php file.
Go to the bottom of functions file and add this code.
// Genesis Tutorial -> How To Add Opt-In Form Below Header By WebsiteGuider
/*
* Step 1: Creating a Widget Area.
*/
genesis_register_sidebar_area(array(
'id' => 'horizontal_optin',
'name' => __('Horizontal Opt-in', 'genesis'),
'description' => __('Easily Create Opt-in Form Below Header', 'genesis'),
));
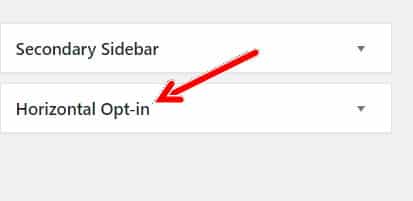
This will create a widget area, and you can see it under the widgets section in WordPress.

Showing The Widget Area In Front-end
Now you have to show this widget area in the front-end of website.
We will use an action hook of genesis named as genesis_after_header. Let’s add the code again in functions.php the file.
// Hook this sidebar to the below header.
add_action('genesis_after_header', 'wg_optin_form');
function wg_optin_form() {
if(is_home() || is_page()) {
return;
} else {
genesis_widget_area('horizontal_optin', array(
'before' => '<div class="optin"><div class="wrap">',
'after' => '</div></div>'
));
}
}
Now you are ready to use the widget area.
Installing Genesis eNews extended and Styling The Widget Area
You have to install a plugin named as Genesis enews extended.
After successful installation, you have to visit the widget area.
There you will find a new widget called as Genesis enews extended.

Add that widget to the widget area we just created.
Fill out the necessary information and hit save.
If you are a beginner, you can watch this video, “How To Setup Genesis eNews extended Properly?”.
If you have followed all the steps, you can style this widget area easily.
Open you style.css and add this code.
.optin {
background: #1a6be4b5;
color: white;
}
.optin .enews {
padding: 4% 0;
}
.optin h3 {
display: inline-block;
margin-right: 4em;
}
.optin form {
display: inline-block;
}
.enews form input, .enews form input[type="submit"] {
width: auto;
}
Conclusion
I hope you loved this short tutorial.
Please subscribe to our YouTube channel and do comment.

Leave a Reply